Ear Piercings: Placement, Safety and Healing Basics
Ear piercings range from fast-healing soft-tissue lobe placements to slower-healing cartilage styles such as helix, conch, tragus and rook. The safest starting point is simple: choose a qualified professional, ask for sterile single-use equipment and body-safe starter jewelry, then leave the jewelry in place while the piercing heals.
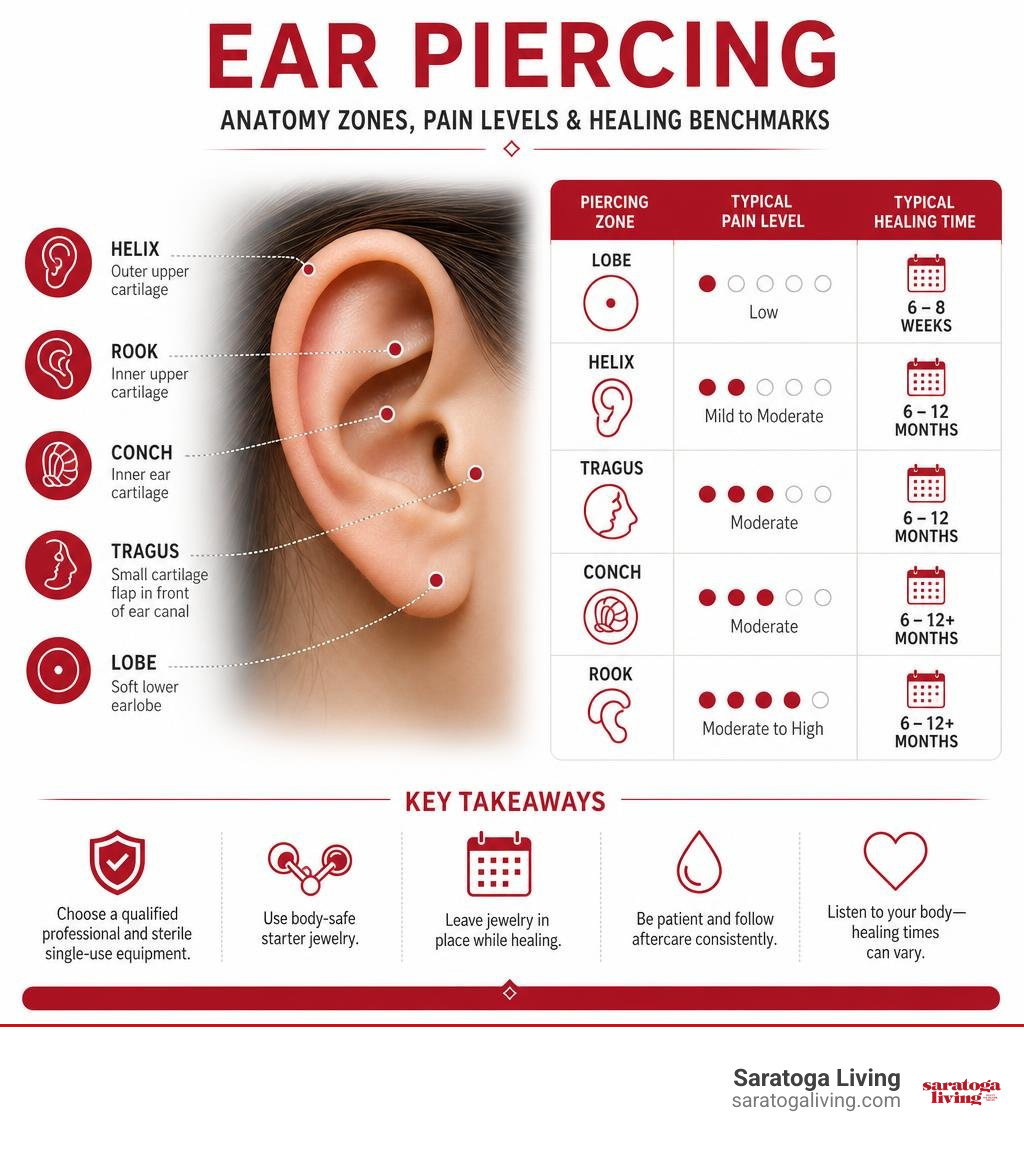
Lobe piercings usually have the shortest recovery, with initial healing often taking six to eight weeks. Cartilage needs far more patience because it has less blood flow; many cartilage piercings take six to 12 months, and some take longer. Pain also varies: lobes tend to feel like a quick pinch, while dense cartilage placements can be more intense.
Whether you want a classic pair of studs or a polished ear stack for Saratoga’s next big event, the best result comes from matching the placement, jewelry and healing commitment to your lifestyle.
Guest Posts shares practical guides to help Saratoga Living readers make informed lifestyle choices.
Easy ear piercings word list:
Anatomy and Types of Ear Piercings
Understanding the anatomy of your ear is essential before booking an appointment. Human ears are complex landscapes consisting of vascular fatty tissue at the base and dense, avascular cartilage across the upper and inner regions. Because blood circulation directly dictates how rapidly tissue regenerates, your body handles a soft lower lobe entirely differently than a rigid upper rim.
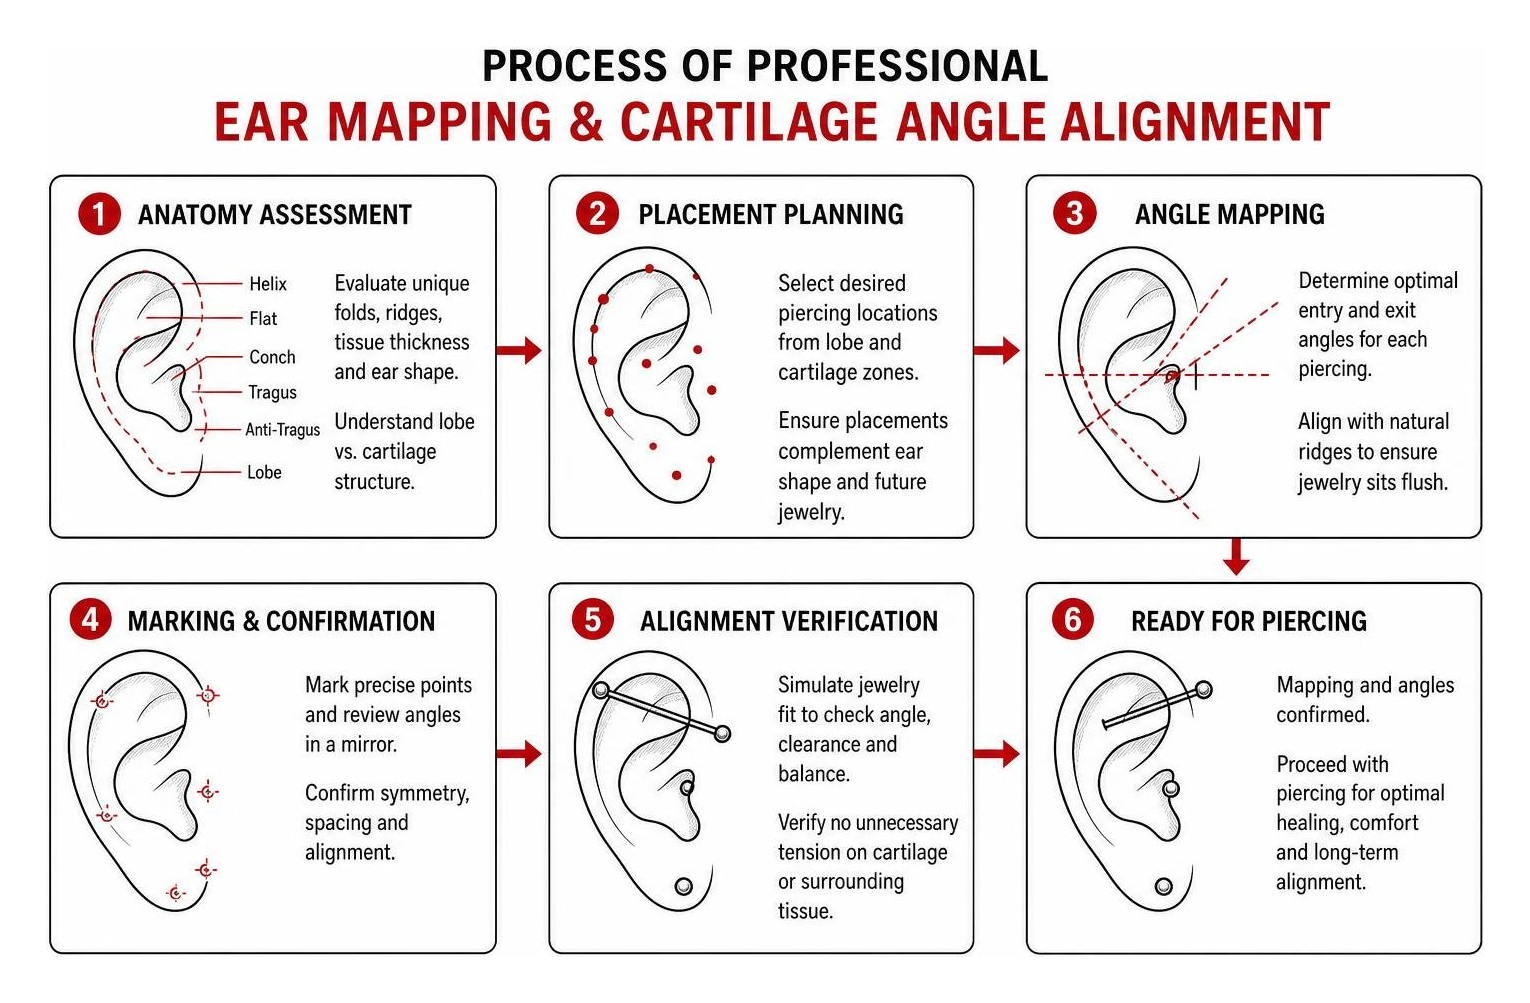
Consulting an ear piercing chart gives you a visual blueprint of how different zones accommodate jewelry. Every ear features unique folds, ridges, and tissue thickness. A skilled practitioner will assess these structural variations to ensure that every angle sits flush against the skin without placing unnecessary tension on surrounding cartilage.
Lobe Placements and Cartilage Zones
Ear modifications span roughly 15 distinct locations, broadly divided between the fleshy lobe and structural cartilage:
- Standard and Upper Lobes: The classic foundation of ear styling. Standard lobes sit in the soft center of the lower tissue, while second, third, and fourth upper lobe piercings climb along the outer edge. The deep history of earlobe piercings stretches back over 5,000 years, making it the most enduring body modification worldwide.
- Stacked and Constellation Lobes: Staggered or vertically stacked studs positioned close together in artistic groupings across the lobe tissue.
- Transverse Lobe: A horizontal barbell that enters the outer edge of the lobe and exits through the inner edge near the jawline.
- Helix and Forward Helix: The outer cartilage rim running along the top of the ear (helix) and the forward curve sitting directly above the tragus (forward helix).
- Flat Placement: Situated on the broad, flat expanse of cartilage between the upper outer curve and the inner ridge.
- Conch: Located in the central cup of the ear cartilage. It can be styled with an eye-catching stud or a large orbital ring wrapping around the outer rim once healed.
- Tragus and Anti-Tragus: The tragus is the thick flap of cartilage projecting immediately over the ear canal, while the anti-tragus sits just above the upper lobe opposite the tragus.
- Daith and Rook: The daith passes through the innermost cartilage ridge right above the ear canal entrance, while the rook is placed vertically through the upper structural shelf of the inner ear.
- Snug: A horizontal piercing passing through the thick inner cartilage ridge of the anti-helix.
- Industrial Barbell: A dramatic modification connecting two separate helix piercings with a single rigid barbell across the upper ear.
Healing Timelines and Pain Scale Comparisons
When tissue is pierced, your body creates an open wound tract. The outer edges undergo epithelialization, creating a surface layer of skin before the deeper cellular tunnel—known as a fistula—fully matures. While surface tenderness often vanishes within weeks, complete structural healing takes substantially longer.
Pain ratings depend largely on nerve density, tissue thickness, and procedural technique. Soft lobes rate lowest on the discomfort index, registering as a minor pinch. Cartilage piercings feel more intense because dense structural tissue must be punctured. Complex configurations like industrials hurt the most because two independent cartilage channels are pierced back-to-back and linked under mechanical tension.
| Piercing Placement | Typical Pain Level (1–10) | Initial Healing Window | Full Fistula Maturation | Recommended Starter Gauge |
|---|---|---|---|---|
| Standard Lobe | 2–3 | 6–8 Weeks | 3–6 Months | 18G–20G |
| High / Stacked Lobe | 2–4 | 6–8 Weeks | 3–6 Months | 18G–20G |
| Helix / Flat | 5–6 | 3–6 Months | 6–12 Months | 16G |
| Forward Helix | 5–7 | 3–6 Months | 6–12 Months | 16G |
| Tragus / Anti-Tragus | 5–6 | 4–6 Months | 6–12 Months | 16G |
| Conch | 6–7 | 4–6 Months | 6–12 Months | 14G–16G |
| Daith | 6–7 | 6–9 Months | 9–12 Months | 16G |
| Rook | 6–8 | 6–12 Months | 12–18 Months | 16G |
| Snug | 7–8 | 9–12 Months | 12–18 Months | 16G |
| Industrial | 8/10 | 6–12 Months | 12–18 Months | 14G |
Safe Piercing Methods and Hypoallergenic Jewelry
Choosing an experienced piercer following strict clinical hygiene standards protects you from serious complications. Reviewing reliable medical insights on ear piercing safety shows that roughly 35% of pierced ears suffer minor complications like contact dermatitis or localized swelling when safety measures are skipped. Clean environments, single-use gear, and medical-grade materials eliminate the vast majority of these issues.
Single-Use Needle vs. Hand-Pressurized Device
The method used to pierce your ear directly influences your recovery speed and pain levels. Professional studios rely on hollow, tri-bevelled surgical needles. These razor-sharp instruments create a clean, precise opening by smoothly displacing tissue, allowing the ear to heal around a smooth jewelry post with minimal trauma. Single-use needles can be completely sterilized in an autoclave and offer pinpoint accuracy across complex cartilage folds.
In contrast, traditional spring-loaded piercing guns force blunt starter studs through the ear using mechanical force. This blunt-force impact crushes delicate tissue and can shatter brittle cartilage, leading to excessive swelling, prolonged recovery, or permanent scarring. Hand-pressurized medical instruments offer a safer alternative for earlobe procedures by gently gliding pre-sterilized cartridges through soft tissue, but single-use hollow needles remain the gold standard for all cartilage work.
Essential Metals for Fresh Ear Piercings
Your body treats new jewelry like a foreign object. Using low-grade alloys containing nickel often triggers allergic contact dermatitis, causing persistent itchiness, weeping, and delayed healing. Fresh piercings require non-porous, biocompatible metals:
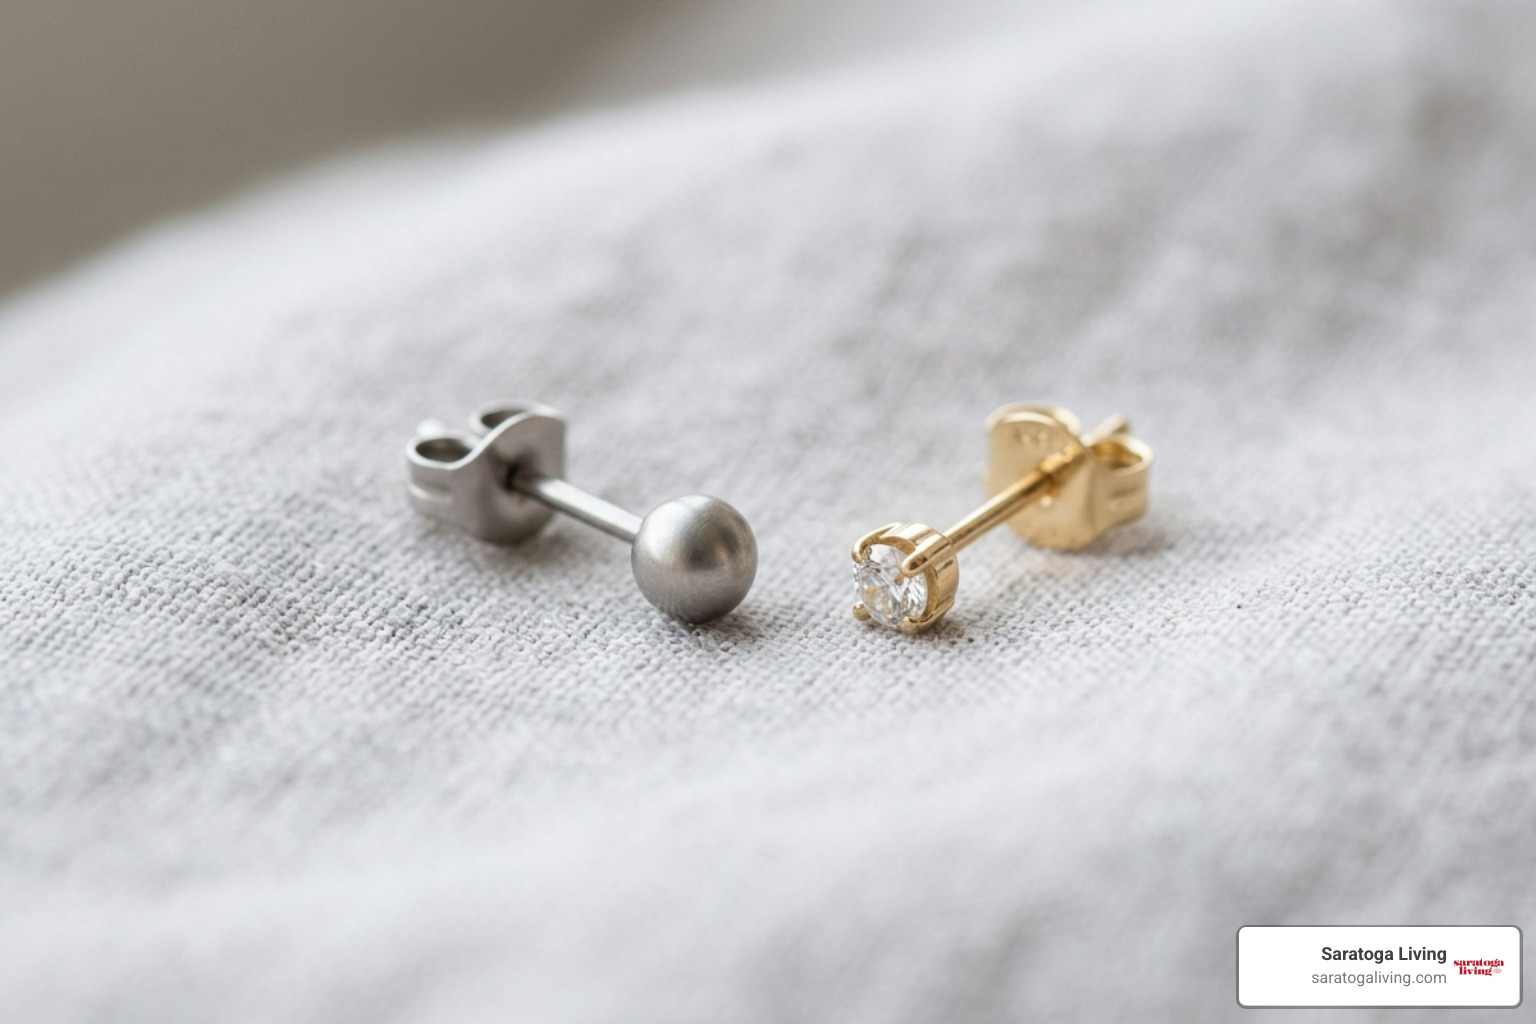
- Implant-Grade Titanium (ASTM F136): Highly biocompatible, completely nickel-free, lightweight, and the absolute best metal for sensitive ears.
- Solid 14k or 18k Gold: Pure gold blended with body-safe alloys. Avoid gold-plated metals for fresh wounds, as the thin outer coating can wear away and expose irritating base metals.
- Implant-Grade Stainless Steel (316L): Durable and cost-effective, though individuals with extreme nickel sensitivities should opt for titanium instead.
- Niobium: An elemental metal that does not react with body fluids, offering great stability for tricky healing spots.
For starter jewelry, flat-back labret studs are far superior to traditional butterfly-back earrings. Butterfly backs trap moisture, dead skin cells, and hair products against the wound tract while pressing uncomfortably into the head during sleep. Modern internally threaded or threadless push-pin labrets feature perfectly smooth post surfaces, preventing delicate healing tissue from catching on coarse exterior screw threads during routine checkups and post downsizing.
Best Practices for Aftercare and Complication Management
Proper aftercare is what turns a raw puncture into a healthy, permanent piercing. Following expert anatomical earlobe placement research ensures your studs sit comfortably, but maintaining diligent hygiene over the coming months keeps irritation at bay.
How to Clean and Care for New Ear Piercings
Modern medical aftercare is simple: keep the area clean, dry, and undisturbed. According to Cleveland Clinic piercing aftercare guidance, the traditional advice to spin or twist starter earrings is outdated and counterproductive. Twisting jewelry breaks delicate newly formed skin cells, re-opens healing wounds, and drags surface bacteria straight into the channel.
- Wash Your Hands: Always scrub your hands with warm water and antibacterial soap before touching your ears.
- Apply Sterile Saline: Spray the front and back of the piercing twice daily using a 0.9% sterile, preservative-free saline wound wash or gentle hypochlorous acid solution.
- Pat Dry: Gently dry the perimeter using clean, disposable paper towels or sterile non-woven gauze. Avoid fibrous cotton swabs that leave stray threads behind.
- Sleep Smart: Avoid sleeping directly on fresh cartilage piercings to prevent friction and uneven pressure angles. A travel donut pillow lets you rest on your side with your ear resting comfortably in the open center.
- Skip Submersion: Steer clear of swimming pools, hot tubs, lakes, and ocean water for at least four to six weeks to avoid bacterial contamination.
Identifying Infection and Irritation Bumps
Minor redness, localized swelling, and clear fluid crusting are normal during the early weeks of recovery. However, complications can sometimes arise:
- Irritation Bumps: Small, raised bumps caused by mechanical friction, sleeping pressure, poor jewelry angles, or improper post lengths. They resolve once the underlying stress is removed and the jewelry is downsized.
- Hypertrophic Scarring and Keloids: Hypertrophic scars are firm, raised borders of excess collagen that stay within the wound boundary. True keloids are larger, dense, genetic scar formations that grow beyond the original piercing site, occurring in approximately 2.5% of cases.
- Embedded Jewelry: If sudden swelling exceeds the post length, earring backings can sink beneath the skin surface, requiring prompt professional adjustment.
If you notice signs of an infection, leave the earring in place to allow drainage and consult a medical physician immediately. Removing jewelry from an actively infected channel can cause the surface hole to close, trapping bacteria inside and forming an abscess.
Curating an Aesthetic Ear Stack for Special Occasions
Ear styling has transformed into a refined art form. Whether you are browsing our advice on how to craft the perfect date night look or deciding what not to wear wedding guest edition, a thoughtfully designed ear stack adds an elegant, contemporary finish to your wardrobe.
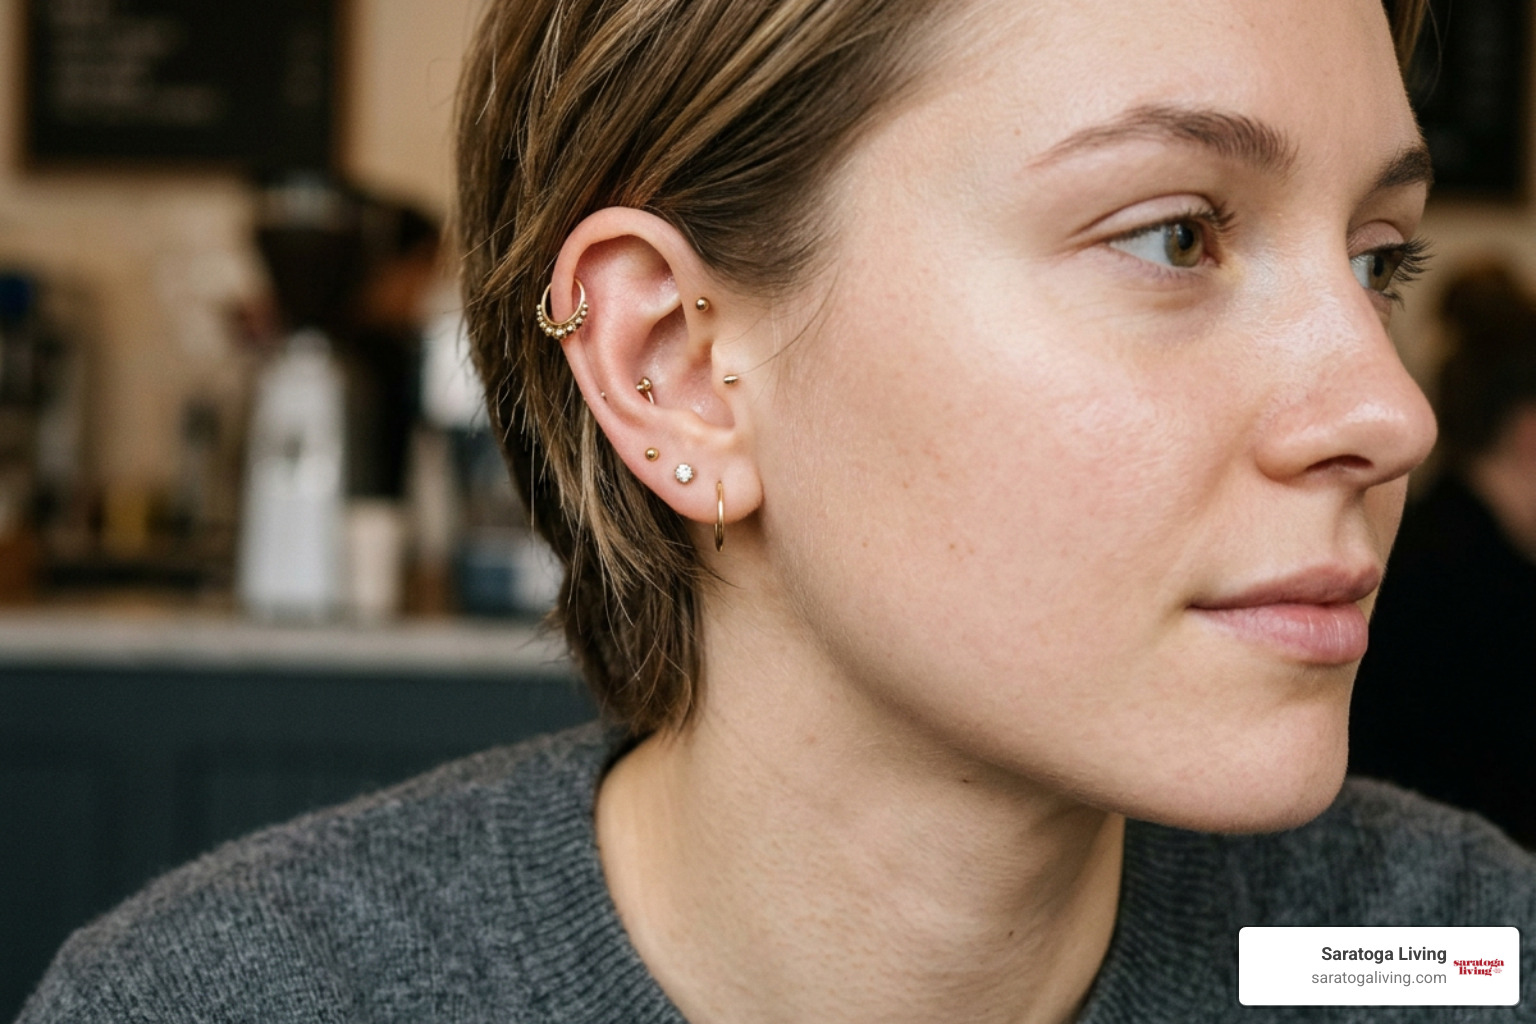
A successful curated ear relies on balance and intentional spacing:
- The 3:2 Rule: An asymmetrical styling standard where one ear features three coordinated pieces (such as a drop earring, a huggie hoop, and a helix stud) while the other wears two minimalist pieces (like a statement stud and a conch ring). This creates visual intrigue without feeling overly uniform.
- Anchor Pieces: Ground your design with your largest earrings in the first lobe position, tapering down to delicate micro-studs and dainty huggies as you move up the ear curve.
- Negative Space: Leave intentional gaps between cartilage placements to keep your ear from feeling crowded. Combining an inner conch stud with an outer helix hoop highlights the ear’s natural architecture.
- Hidden Helix (“Peekaboo”) Accents: A subtle placement beneath the upper cartilage fold where a sparkling diamond or gold charm remains hidden until you tuck your hair behind your ear.
- Mixed Metals and Textures: Blending warm 14k yellow gold with cool titanium and sparkling pavé gemstones brings rich depth to both everyday wear and formal evening ensembles.
Frequently Asked Questions About Ear Piercings
How long should I wait before changing my earrings?
Leave starter earrings in continuously for at least 6 to 8 weeks for standard lobe piercings and 6 to 12 months for cartilage placements. Even after this initial window, return to your piercer to have your jewelry posts downsized once initial swelling subsides. Freshly healed tracts can shrink or close in minutes if jewelry is removed prematurely during the first six months.
Can I get multiple ear piercings in a single session?
Yes, but moderation is key. Most professional piercers recommend limiting a single appointment to two or three lobe piercings, or no more than two cartilage piercings on the same ear. Piercing cartilage on both ears simultaneously makes side sleeping virtually impossible and overtaxes your body’s immune response during recovery.
What age requirements and consent rules apply to minors?
State regulations and studio policies vary. Many clinical studios perform infant lobe piercings starting at two to three months of age, provided the child has received their first DTaP vaccination. For cartilage and advanced needle piercings, clients must typically be at least 13 to 16 years old with a parent or legal guardian present, accompanied by government-issued photo identification and birth certificates.
Conclusion
A beautiful ear piercing blends clinical precision, thoughtful placement, and personal expression. By choosing an experienced piercer, investing in hypoallergenic metals like implant-grade titanium or solid gold, and committing to simple saline aftercare, you ensure your ear stack heals smoothly and looks stunning for years to come.
Whether you are planning your very first lobe piercing or building a statement stack for our fit check the belmont stakes coverage, taking a patient, safety-first approach will give you an effortless look that shines across every season.